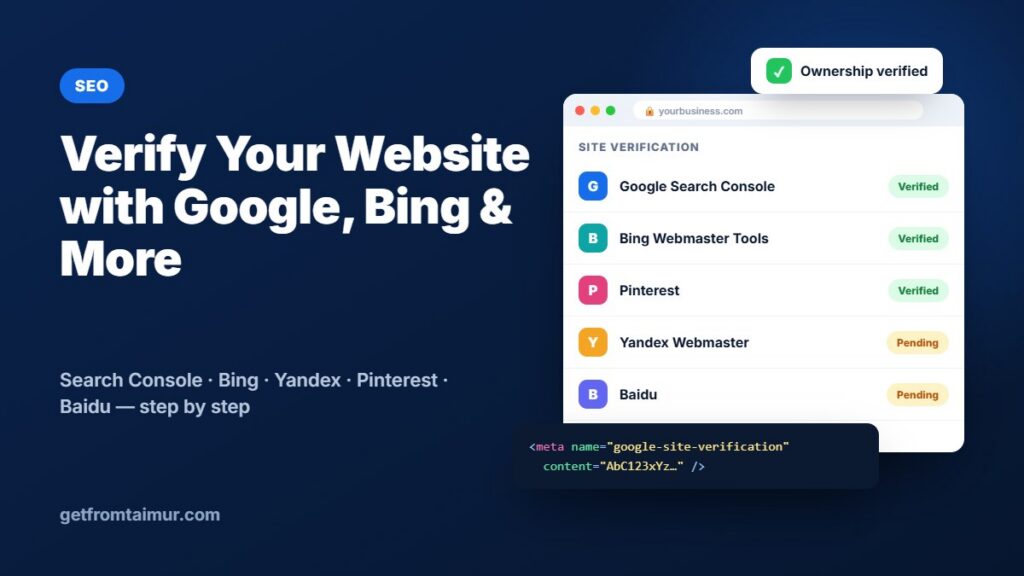
Before Google, Bing or Pinterest will show you how your website performs, they ask a simple question: is this really your site? Answering it is called website verification. Once you verify your website with Google Search Console, Bing Webmaster Tools and the other services, you unlock search data, indexing tools, error reports and — on Pinterest — your name and logo on every Pin saved from your site.
The good news: on a WordPress site, verification takes about five minutes per service. You copy a short code from each service, paste it into your SEO plugin, save, and click Verify. This guide walks you through every step for Google, Bing, Yandex, Pinterest and Baidu, explains which verification method to choose, and shows how to fix the most common errors.
What Is Website Verification and Why Does It Matter?
Search engines and social platforms keep detailed information about every website: which pages are indexed, which keywords bring visitors, which links point to the site and which errors stop pages from appearing. That information is private. Verification proves you control the website, so the service can safely share it with you and let you make changes such as submitting a sitemap or removing an outdated page.
What you unlock after verifying
- Search performance data – the real search terms people type before they click on your site, with clicks, impressions and average position.
- Indexing reports – which pages are in the search engine’s index, which are excluded and why.
- Sitemap submission – tell the search engine about all your pages at once instead of waiting for it to find them.
- Error alerts – emails when your site has security issues, manual actions, mobile problems or a sudden drop in indexed pages.
- URL inspection – test a single page, see how the crawler sees it, and request indexing after an update.
- Brand features – on Pinterest, a claimed website shows your profile picture and name on Pins from your domain, and unlocks website analytics.
Who should verify?
Every business website should be verified with Google Search Console and Bing Webmaster Tools — together they cover the vast majority of search traffic in most countries, and Bing data also feeds Yahoo, DuckDuckGo and several AI assistants. Add Pinterest if you sell visual products such as clothing, printing, décor or crafts. Yandex matters if you target Russia, Turkey or Central Asia, and Baidu if you target mainland China.
The Four Ways to Verify a Website
Most services offer several verification methods. They all prove the same thing; they differ in where you place the proof.
1. HTML meta tag (recommended for WordPress)
The service gives you a one-line tag such as <meta name="google-site-verification" content="abc123…" />. An SEO plugin adds it to the <head> of your homepage. It is the fastest method, needs no server access, and survives theme changes because the plugin outputs it, not the theme.
2. HTML file upload
You download a small file (for example google1234abcd.html) and upload it to the root folder of your website using your hosting file manager or FTP. Reliable, but you must remember not to delete the file later.
3. DNS record
You add a TXT or CNAME record at your domain registrar or DNS provider. This is the only method Google accepts for a Domain property (which covers http, https, www and every subdomain at once). DNS changes can take from a few minutes to 48 hours to spread.
4. Connected accounts
Some services verify through another account you already control: Google Search Console can use Google Analytics or Google Tag Manager, and Bing Webmaster Tools can import sites you have already verified in Google Search Console.
Which should you choose?
On WordPress, use the meta tag method with your SEO plugin for every service. If you want Google to report on all versions of your domain together, add a DNS-verified Domain property as well. Keep whatever you use in place permanently — services re-check verification from time to time.
Before You Start: A Two-Minute Checklist
- Know your exact website address. Open your homepage and copy the URL from the browser bar, including
https://and whether it haswww. Verification is tied to that exact address. - Make sure the site is public. In WordPress, go to Settings → Reading and confirm “Discourage search engines from indexing this site” is not ticked, and that no “coming soon” or maintenance mode hides the homepage.
- Have an SEO plugin active. This guide uses Taimur SEO (Taimur SEO → Settings → Verification). Yoast SEO, Rank Math, AIOSEO and SEOPress have similar fields.
- Know how to clear your cache. If you use LiteSpeed Cache, WP Rocket, Cloudflare or hosting cache, you will purge it after saving the code.
- Sign in with a long-term account. Use a business Google or Microsoft account you will still control in years to come, not a personal account of a staff member.
How to Verify Your Website with Google Search Console
Google Search Console is the most important verification for almost every website. It shows the search terms that bring visitors, pages Google cannot index, Core Web Vitals and much more. If you are new to it, read our Google Search Console guide for beginners after you finish verification.
Step 1: Open Search Console and add a property
Go to Google Search Console and sign in. Google offers two property types:
Domain property
Covers every protocol and subdomain (http, https, www, shop. …). It can only be verified with a DNS TXT record.
URL-prefix property
Covers one exact address, such as https://www.example.com/. It can be verified with the HTML tag, which is the easiest route on WordPress. Enter your homepage address exactly as it appears in the browser and click Continue.
Step 2: Copy the HTML tag
On the “Verify ownership” screen, open HTML tag (under “Other verification methods”) and click Copy. The tag looks like this:
<meta name="google-site-verification" content="AbC123xYz…" />
Leave this browser tab open — you will come back to click Verify.
Step 3: Paste it into your SEO plugin
In WordPress, open Taimur SEO → Settings → Verification and paste the whole tag into the Google Search Console field. You can paste either the full tag or only the code between the quotes; Taimur SEO keeps just the code and outputs the correct tag on your homepage. Click Save Changes, then purge your cache.
Step 4: Click Verify
Return to Search Console and click Verify. You should see “Ownership verified” within seconds. If not, jump to the troubleshooting section.
Step 5: Submit your sitemap
In Search Console, open Sitemaps, enter wp-sitemap.xml (the address shown in Taimur SEO → Settings → Indexing) and click Submit. Google will now discover all your public pages, posts and categories.
Optional: add a Domain property too
For a complete picture, also add a Domain property. Google shows a TXT record such as google-site-verification=…; add it as a TXT record for your root domain (host @) at your registrar, wait a few minutes, and click Verify. Google’s official instructions are on the Verify your site ownership help page.
How to Verify Your Website with Bing Webmaster Tools
Bing powers Bing search, Yahoo results, DuckDuckGo’s main web results and Microsoft Copilot. Verifying with Bing Webmaster Tools also lets Taimur SEO’s IndexNow feature shine: new and updated pages are crawled within minutes.
The fastest way: import from Google
If you have just verified Google Search Console, go to Bing Webmaster Tools, sign in, and choose Import from Google Search Console. Allow access, pick your site, and Bing verifies it and imports your sitemap automatically — no code needed.
The meta tag way
Step 1: Add your site
In Bing Webmaster Tools, choose Add your site manually, enter your homepage address and click Add.
Step 2: Copy the HTML meta tag
Select the HTML Meta Tag option and copy the tag. It looks like <meta name="msvalidate.01" content="1A2B3C…" />.
Step 3: Paste and save
Paste it into the Bing Webmaster Tools field in Taimur SEO → Settings → Verification, save and purge your cache.
Step 4: Verify and add your sitemap
Back in Bing, click Verify. Then open Sitemaps and submit https://yourdomain.com/wp-sitemap.xml. Microsoft’s own walkthrough for WordPress is in the Bing Webmaster documentation.
How to Verify Your Website with Yandex Webmaster
Yandex is the leading search engine in Russia and is widely used in Turkey, Kazakhstan and Belarus. If you sell to customers there, Yandex Webmaster shows how your pages are indexed and which searches bring visitors.
Step 1: Add the site
Sign in with a Yandex ID and open Yandex Webmaster → Add site. Enter your homepage address. You are taken straight to the access-rights page.
Step 2: Choose “Meta tag”
Yandex recommends the HTML file method, but the meta tag works just as well with WordPress. Select Meta tag and copy the tag: <meta name="yandex-verification" content="…" />.
Step 3: Paste, save and check
Paste it into the Yandex Webmaster field in Taimur SEO, save and purge your cache. Open your homepage, view the page source (Ctrl + U) and search for yandex-verification to confirm the tag is inside the <head>.
Step 4: Click Verify
Back in Yandex Webmaster, click Verify. Yandex says checks can take up to 24 hours, although most complete immediately. The official guide is Verifying the site rights.
How to Claim Your Website on Pinterest
Pinterest calls verification “claiming” your website. A claimed website shows your profile picture and name on every Pin saved from your site, gives you website analytics, and is required for product catalogues and shopping features. You need a free Pinterest business account.
Step 1: Open the claim settings
Sign in to Pinterest, click your profile picture, open Settings and choose Claimed accounts (or go straight to pinterest.com/settings/claim). Next to Websites, click Claim.
Step 2: Copy the HTML tag
Choose Add HTML tag and copy it: <meta name="p:domain_verify" content="…" />.
Step 3: Paste and save
Paste it into the Pinterest field in Taimur SEO → Settings → Verification, save and purge your cache.
Step 4: Finish the claim
Back in Pinterest, click Continue, enter your website address and submit. Pinterest usually confirms within a few minutes but can take up to 24 hours; you will get an email when the claim is complete. Details are in Pinterest’s Claim your website article.
Get more from a claimed website
Once claimed, Pins from your site use the share title, description and image set in Taimur SEO’s Social tab, so write them with Pinterest in mind. Our image SEO guide for WordPress explains how to prepare images that look great when shared.
How to Verify Your Website with Baidu
Baidu is China’s largest search engine. Its webmaster platform, Baidu Search Resource Platform (also called Baidu Ziyuan), is only available in Simplified Chinese, and you need a Baidu account; a browser translation extension helps.
Step 1: Add the site
Sign in at ziyuan.baidu.com, open User Center → Site Management and click Add Website (添加网站). Enter your address, choose the protocol and select your site categories.
Step 2: Choose HTML tag verification
Select HTML tag verification (HTML标签验证) and copy the tag: <meta name="baidu-site-verification" content="code-…" />.
Step 3: Paste, save and complete
Paste it into the Baidu field in Taimur SEO, save, purge the cache and click Complete verification (完成验证). If it fails at first, wait three to five minutes and try again.
Should you bother with Baidu?
Only if you actively target customers in mainland China with Chinese-language content. Baidu strongly favours sites hosted in or near China with simplified Chinese content, so verification alone will not bring traffic from China.
Troubleshooting: Why Verification Fails and How to Fix It
“Verification tag not found”
This is almost always caching. The service sees an old copy of your homepage from before you saved the code. Purge every cache layer — your caching plugin (for example LiteSpeed Cache → Purge All), your host’s cache and Cloudflare — then click Verify again.
Wrong address
The property address must match your real homepage. If your site redirects from example.com to www.example.com, verify the www version (or use a Google Domain property). Also check http versus https.
The code was pasted twice or in the wrong field
Each service uses its own tag name. A Bing code in the Google field will not work. Open your homepage source (Ctrl + U) and search for the tag name: google-site-verification, msvalidate.01, yandex-verification, p:domain_verify or baidu-site-verification. It should appear exactly once, inside the <head>.
Another plugin also prints the tag
If you switched from another SEO plugin, or use a “header and footer code” plugin, an old tag might still be printed. Remove old copies so there is only one per service. Taimur SEO automatically pauses its output when Yoast, Rank Math or AIOSEO is active, so deactivate the old plugin first.
The site is blocked or hidden
A maintenance page, password protection, a firewall rule or “Discourage search engines” can stop the verification bot. Temporarily allow access, verify, then restore your settings.
DNS record not found yet
DNS changes can take time to spread. Check that the TXT record is on the root domain (host @), contains the full value without extra quotes, and wait up to 24 hours.
Quick test
Open your homepage in a private browser window, view the source and search for the tag. If you can see it there, the service will too — try Verify again in a few minutes.
Verifying Several Websites or Client Sites
If you manage websites for clients or run several brands, a little organisation saves hours later.
Use the client’s own accounts
Ask each client to create (or share) a business Google and Microsoft account, verify the site there, and then add you as a user. The client keeps ownership of their data if they ever change agency.
Keep a verification log
Record each website, the services it is verified with, the method used and which accounts are owners. When a team member leaves, you know exactly which access to update.
Re-check after migrations
Moving to a new domain, switching from http to https, or rebuilding the homepage can break verification. After any migration, open each service, confirm the property is still verified, and add a new property for the new address if needed.
What to Do After Verifying
Submit your sitemap everywhere
Submit wp-sitemap.xml in Google Search Console, Bing Webmaster Tools and Yandex Webmaster. Taimur SEO keeps the sitemap clean by removing noindexed pages and attachment pages automatically.
Turn on instant indexing
Keep IndexNow enabled in Taimur SEO → Settings → Advanced. Every time you publish or update content, Bing, Yandex and other IndexNow engines are notified straight away.
Add more owners
In Google Search Console, open Settings → Users and permissions and add a second owner (for example your developer or another manager) so you never lose access if one account is closed.
Check reports monthly
Once a month, review the Pages (indexing) report, the Performance report and any messages. Fix errors quickly, and use the search terms you see to plan new content — our local SEO guide and WooCommerce SEO checklist show what to do next.
Never remove the tags
Services re-check verification regularly. If the tag disappears — for example after switching SEO plugins or rebuilding the homepage — you can lose access to your data until you verify again. Keep the codes saved in your SEO plugin permanently.
Verification at a Glance
- Google Search Console – URL-prefix property → HTML tag → paste → Verify → submit sitemap. Tag name:
google-site-verification. - Bing Webmaster Tools – import from Google Search Console, or HTML Meta Tag → paste → Verify. Tag name:
msvalidate.01. - Yandex Webmaster – Add site → Meta tag → paste → Verify (up to 24 hours). Tag name:
yandex-verification. - Pinterest – Settings → Claimed accounts → Claim website → HTML tag → paste → Continue. Tag name:
p:domain_verify. - Baidu – Add website → HTML tag verification → paste → Complete verification. Tag name:
baidu-site-verification.
Related Reading and Resources
More guides from our blog
- Google Search Console for Beginners — what every report means and how to use the data to grow traffic.
- WooCommerce SEO Checklist: 12 Steps to Complete Before You Launch — sitemaps, product titles, image alt text and site speed.
- Local SEO for Small Business — get found by customers in your area.
- WordPress Speed Optimization — faster pages rank and convert better.
- Image SEO for WordPress — file names, alt text and share images.
Official help pages
- Google: Verify your site ownership
- Bing: Verifying WordPress sites
- Yandex: Verifying the site rights
- Pinterest: Claim your website
Frequently Asked Questions
Is website verification free?
Yes. Google Search Console, Bing Webmaster Tools, Yandex Webmaster, Pinterest and Baidu all verify websites for free.
Does verifying my site improve my rankings?
Not directly. Verification gives you the data and tools to find and fix problems, submit sitemaps and request indexing — and those actions improve rankings.
Do I need to keep the verification tag after verifying?
Yes. Services re-check periodically, and removing the tag can remove your access. Leave the codes in your SEO plugin.
Can I verify the same site with several Google accounts?
Yes. Each owner can verify with their own tag, or a verified owner can add other users in Search Console settings.
Can you set up Search Console and Bing for my website?
Yes. Every website package from Get From Taimur includes SEO setup: verification with Google and Bing, sitemap submission and IndexNow. See our website packages or contact us.
Conclusion: Five Minutes That Pay Off for Years
When you verify your website with Google Search Console, Bing Webmaster Tools, Yandex, Pinterest and Baidu, you turn search engines from a black box into a source of clear, actionable data. On WordPress the process is the same everywhere: copy the HTML tag, paste it into Taimur SEO, save, clear the cache and click Verify. Do Google and Bing today, add the others that match your audience, submit your sitemap, and check your reports every month.